Create, install and run python packges using GitHub
In this example we show how to use GitHub to create a python package (using pip) from various (python) source files. The created package file (*.tar.gz) is then installed and run on your fleet of Raspberry Pis or embedded edge devices.
The process starts by pushing the changes of your source code to your GitHub repository. Then, using GitHub actions, your source code is packaged and finally the package is placed into your qbee.io file manager. From there on you can distribute and install it on the group of devices you have specified.
We provide a sample test script that uses the newly installed package. As a convenient feature this script is also distributed along with the package.
If we want to build an executable (called hi-pi) for our Raspberry Pi we can use the following code
The way of packaging is inspired by this tutorial.
The package folder structure
To build our own python package called py_qbee_tst we need a folder structure as follows:
File structure
py_qbee_tst/
  py_qbee_tst/
    __init__.py
    hello.py
    bye.py
  bin/
    qbee_tst.py
  setup.py
where the source files of the package are located in the subdirectory py_qbee_tst/. In the bin/ directory we have placed a sample script that is installed along with the package. The setup.py gives details about the package to be built.
To build our package py_qbee_tst for the installation with pip we can simply run the command
python3 setup.py sdist
*.tar.gz file containing the package. This package can now be distributed to any target system and being installed via pip3 install py_qbee_tst-0.1.tar.gz
python project. The package source files to be built
Our toy project consists of two python files containing implemented routines and __init__.py file collecting all relevant routines.
hello.py
def hello():
    return (u'Hello from qbee.io')
by.py
def bye():
    return (u'Goodbye from qbee.io')
__init__.py
from .hello import *
from .bye import *
The package setup file
In order to create a package, we define a setup file.
setup.py
from setuptools import setup

setup(name='py_qbee_tst',
    version='0.1',
    description='test package to run on qbee.io',
    author='qbee AS',
    author_email='author@somemail.com',
    license='MIT',
    packages=['py_qbee_tst'],
    scripts=['bin/qbee_tst.py'],
    zip_safe=False)
Testing the installed package
For testing purposes we ship a script along with the package that is placed in the bin/ directory.
qbee_tst.py
#!/usr/bin/env python3

import py_qbee_tst as qbee
print( qbee.hello() )
print( qbee.bye() )
Automatic workflow using GitHub
However, we aim to setup an automatic workflow, where we
- use git as for version control management
- setup a GitHub runner (using GitHub actions) to build our code once a push is triggered
- copy the created package to the
qbee.iofile manager via API calls - use the
qbee.iofile distribution to distribute (and install) the package on a list of devices
How to create a repository on GitHub
Check out the official documentation on how to create a repository on GitHub.
Once a repository is set up, before creating a runner, setup GitHub secrets as shown in the following screenshot.
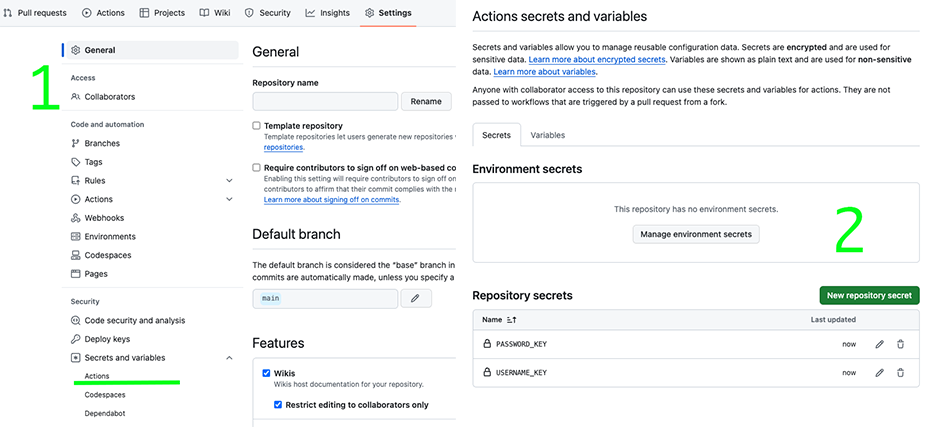
There we specify our qbee.io username USERNAME_KEY and password PASSWORD_KEY, as we do not want them to be exposed.
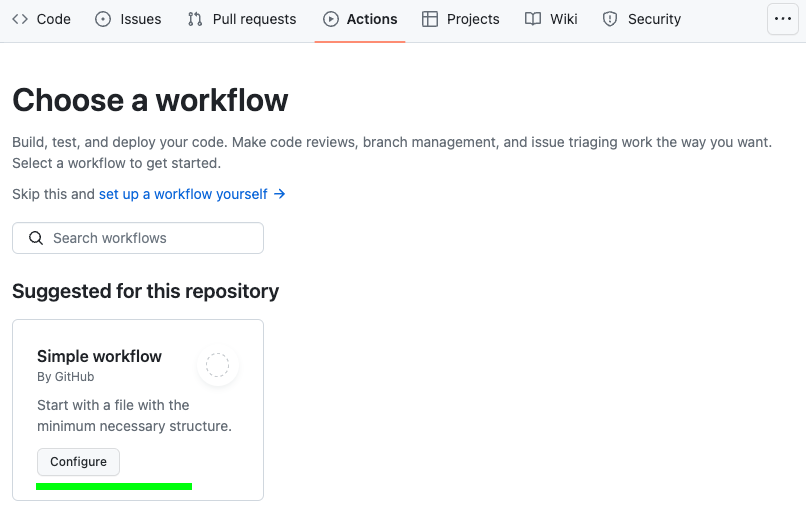
Next thing that needs to be done is to create GitHub actions. These run a specific setup script on the so-called runners. You can use the ones provided by GitHub. Alternatively, it is possible to use your own. If you click on "set up a workflow yourself" you can create your workflow.
The script we used is the following:
python-publish.yml
name: Upload Python Package

on:
push:
    branches: [main]

jobs:
deploy:

    runs-on: ubuntu-latest

    steps:
    - uses: actions/checkout@v2

    - name: Set up Python
      uses: actions/setup-python@v2
      with:
        python-version: '3.x'

    - name: Install dependencies
      run: |
        python -m pip install --upgrade pip
        pip install setuptools wheel

    - name: Build
      run: |
        python setup.py sdist
        echo `ls dist/`

    - name: qbee.io authentication
      uses: qbee-io/authenticate-action@main
      with:
        login: ${{ secrets.USERNAME_KEY }}
        password: ${{ secrets.PASSWORD_KEY }}

    - name: qbee.io file upload
      uses: qbee-io/qbee-io/file-upload-action@main
      with:
        source: 'dist/py_qbee_tst-0.1.tar.gz'
        destination: '/'
Comments on the yaml file
- this action is triggered on pushes to the
mainbranch - the runner is a virtual machine with an
UbuntuOS as we specifiedubuntu-latest - this new virtual machine runs
actions/checkout@v2to receive the code from the repository python3along with the necessary dependencies is set up such that the code can be packaged- the actual packaging is done via
python setup.py sdist - a custom GitHub action places the output file into the
qbee.iofile manager (within the action theqbee.ioREST API is used, c.f. file distribution via API)
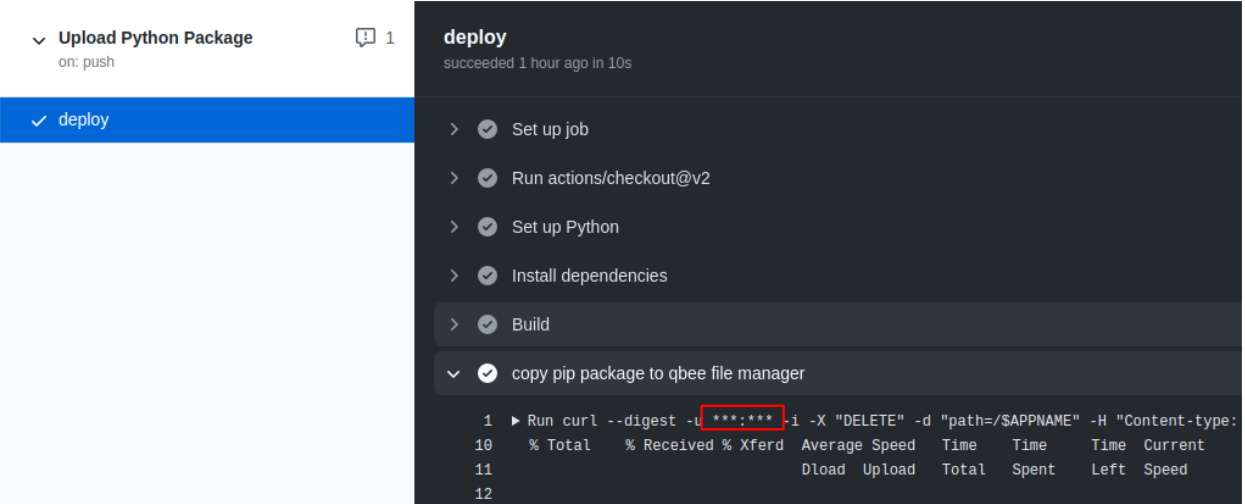
Note that your credentials aren't revealed as we use GitHub secrets to encrypt them as can be seen in the action output
Package installation using file distribution
Finally, we distribute our package file to the remote devices as usual with the file distribution.
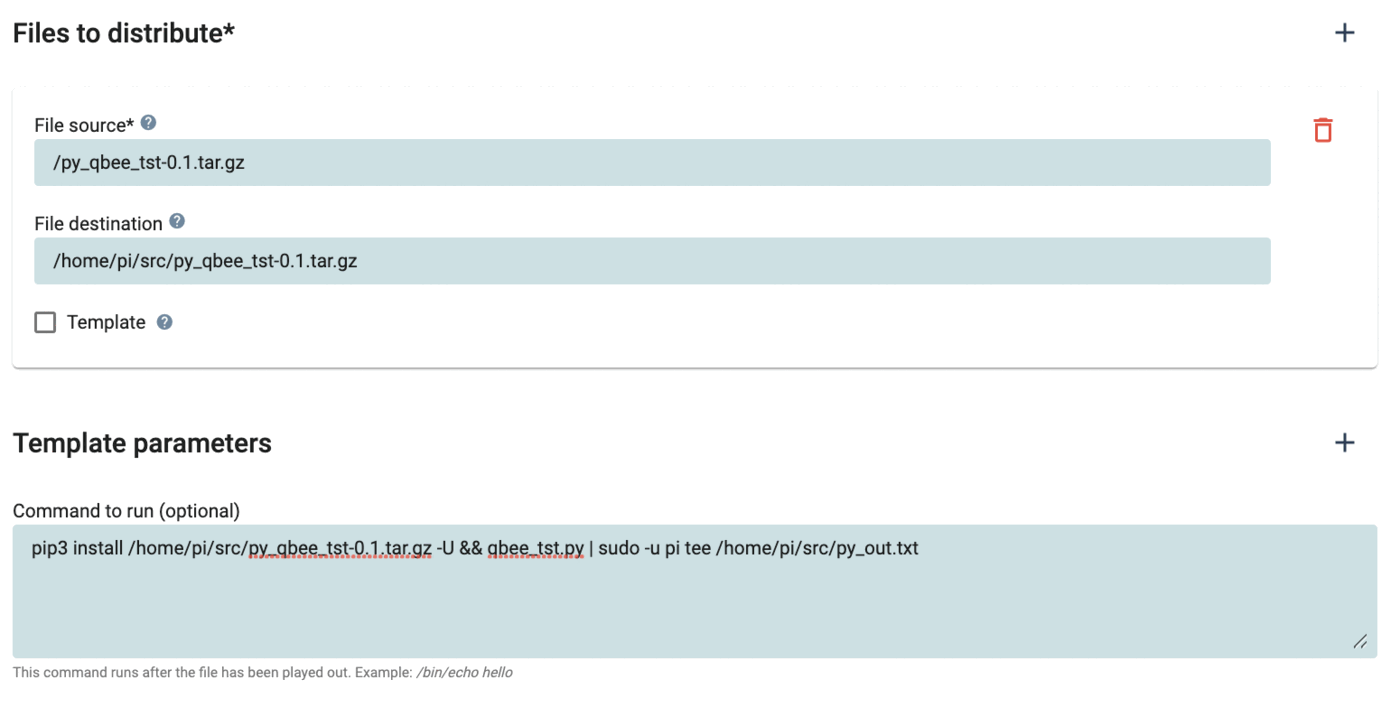
Note that the package installation is very simple. Using pip3 (since we install it for python3) we do not need to unpack the created *.tar.gz package. Via the command
pip3 install /home/pi/src/py_qbee_tst-0.1.tar.gz -U
py_qbee_tst with version 0.1 is installed globally and the flag -U causes an update if the package is already installed. The test script qbee_tst.py which was placed in the bin directory of your source code folder structure is also installed globally in the directory /usr/local/bin. Therefore we add the run command qbee_tst.py | sudo -u pi tee /home/pi/src/py_out.txt
tee with the user pi to create an output file with owner pi. As we can see from the output the installation and test script worked. 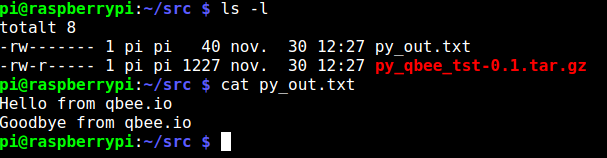
Compare with the script presented in Testing the installed package
Automatic deployment
Using this workflow, every time you push your code changes to the repository the package file will always be replaced within the qbee.io file manager. Upon a new file upload the qbee.io file distribution is triggered along with the run command that you provided (which is the package install along with the test script).
Hence, all your edge devices are updated by a simple git push :)
Package version
For ease of presentation we hard-coded the installation of version 0.1 of our custom py_qbee_tst package. Of course one could change the setup such that always the newest version is installed replacing the older one.