Install Pi-hole on DietPi
In this example, we will install Pi-hole Docker on a DietPi. We will leverage features such as secrets, file distribution with templating, and post-command.
Prerequisites
- Latest DietPi version
- Installed and bootstrapped qbee-agent on the device (see: Bootstrapped a device)
- Installed Docker (see: qbee.io Docker Installation). NOTE: On step 2, use user DietPi instead of pi:
sudo usermod -aG docker dietpi. Do not proceed with step 3 as Docker-compose is already available. - Less than 5 minutes of your time ;)
Let's Go
Pi-hole can be installed in several ways, but the easiest one is to use the Docker image provided by the Pi-hole team. The image can be found on GitHub: Pi-hole Docker GitHub.
- Download the
compose.ymlfile. Uncomment the
WEBPASSWORDline and set its value to{{PIHOLE_WEBPASSWORD}}.- This adds a template variable, allowing dynamic password configuration. It hides the password from the configuration visible in the qbee.io UI.
version: "3"

# More info at https://github.com/pi-hole/docker-pi-hole/ and https://docs.pi-hole.net/
services:
pihole:
container_name: pihole
image: pihole/pihole:latest
# For DHCP it is recommended to remove these ports and instead add: network_mode: "host"
ports:
- "53:53/tcp"
  - "53:53/udp"
  - "67:67/udp" # Only required if you are using Pi-hole as your DHCP server
  - "80:80/tcp"
  environment:
  TZ: 'America/Chicago'
  WEBPASSWORD: '{{PIHOLE_WEBPASSWORD}}'
# Volumes store your data between container upgrades
volumes:
- './etc-pihole:/etc/pihole'
  - './etc-dnsmasq.d:/etc/dnsmasq.d'
#   https://github.com/pi-hole/docker-pi-hole#note-on-capabilities
cap_add:
- NET_ADMIN # Required if you are using Pi-hole as your DHCP server, else not needed
restart: unless-stopped
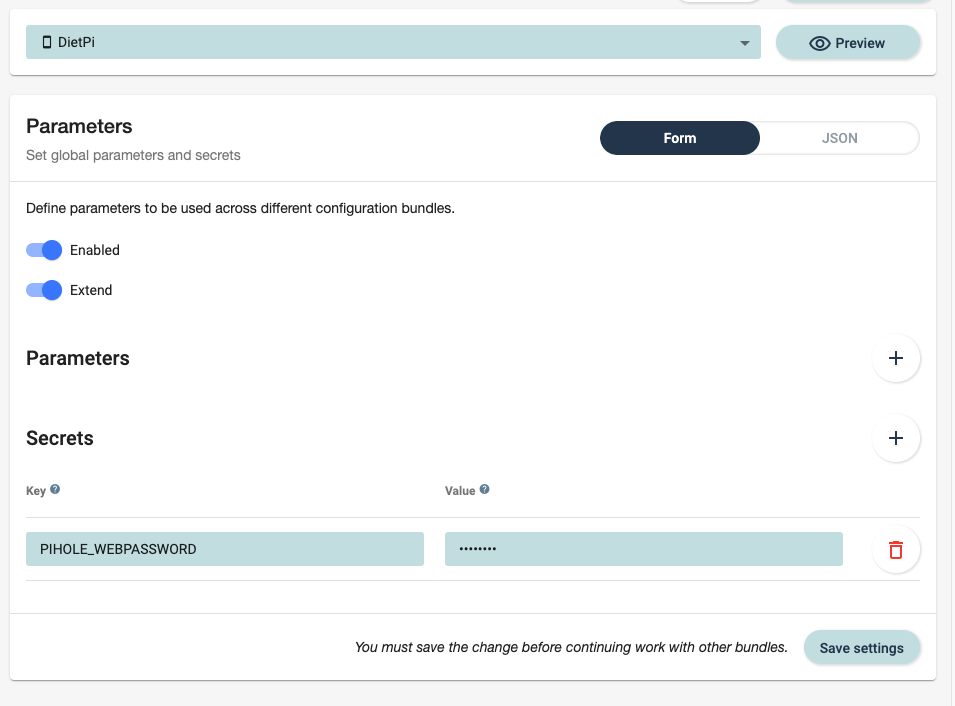
Setting the Password via Secrets
Let's set the actual value for the PIHOLE_WEBPASSWORD parameter.
Open the Configure -> Parameters page.
Select your DietPi device if you want to set the password per device, or choose All Devices if you want the same password on all devices.
In the Secrets section, add
PIHOLE_WEBPASSWORDas a key and set the desired password as its value.
Uploading the file
Open the file manager and upload the file 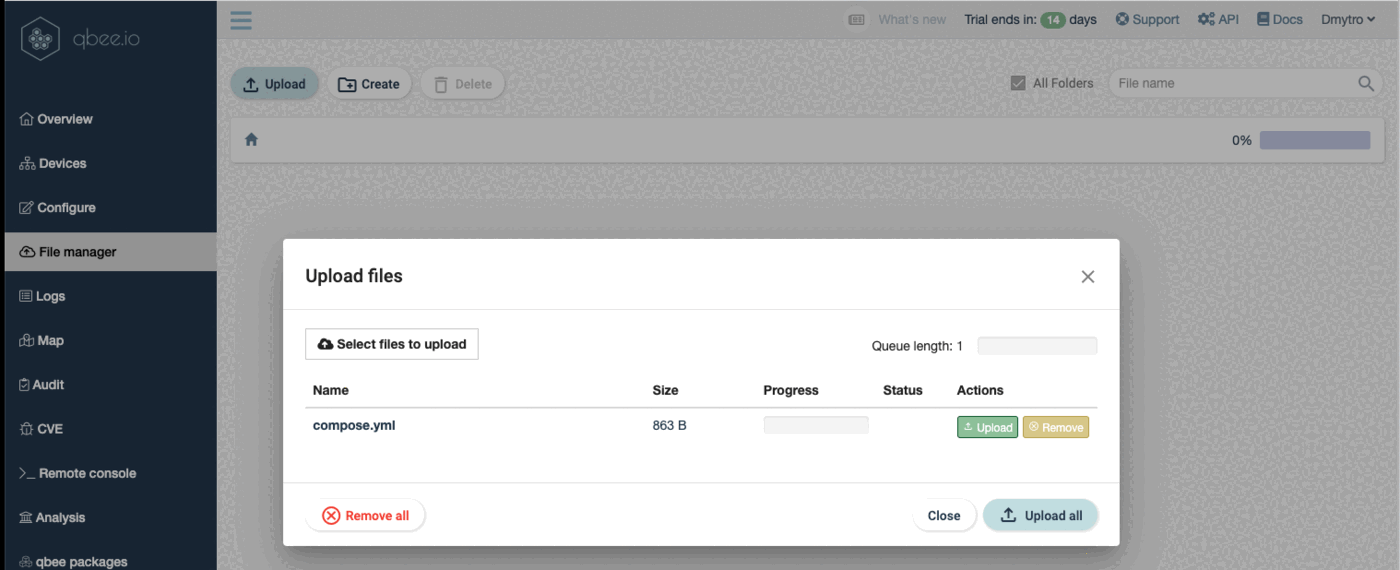
Creating Configuration
All preparations are complete. Let's proceed with File Distribution:
Open Configuration -> File Distribution.
Select either All devices or our specific DietPi device.
In "Files to distribute" -> "File source," select the file that you uploaded.
In the "Destination," choose the folder where you want to place the
composer.ymlfile. Make sure to name itcomposer.yml.Check the "Template" checkbox.
In "Template parameters," enter:
- Key:
PIHOLE_WEBPASSWORD - Value:
$(PIHOLE_WEBPASSWORD)
- Key:
In the "Command to run" field, enter:
cd /home/dietpi/docker
docker-compose up -d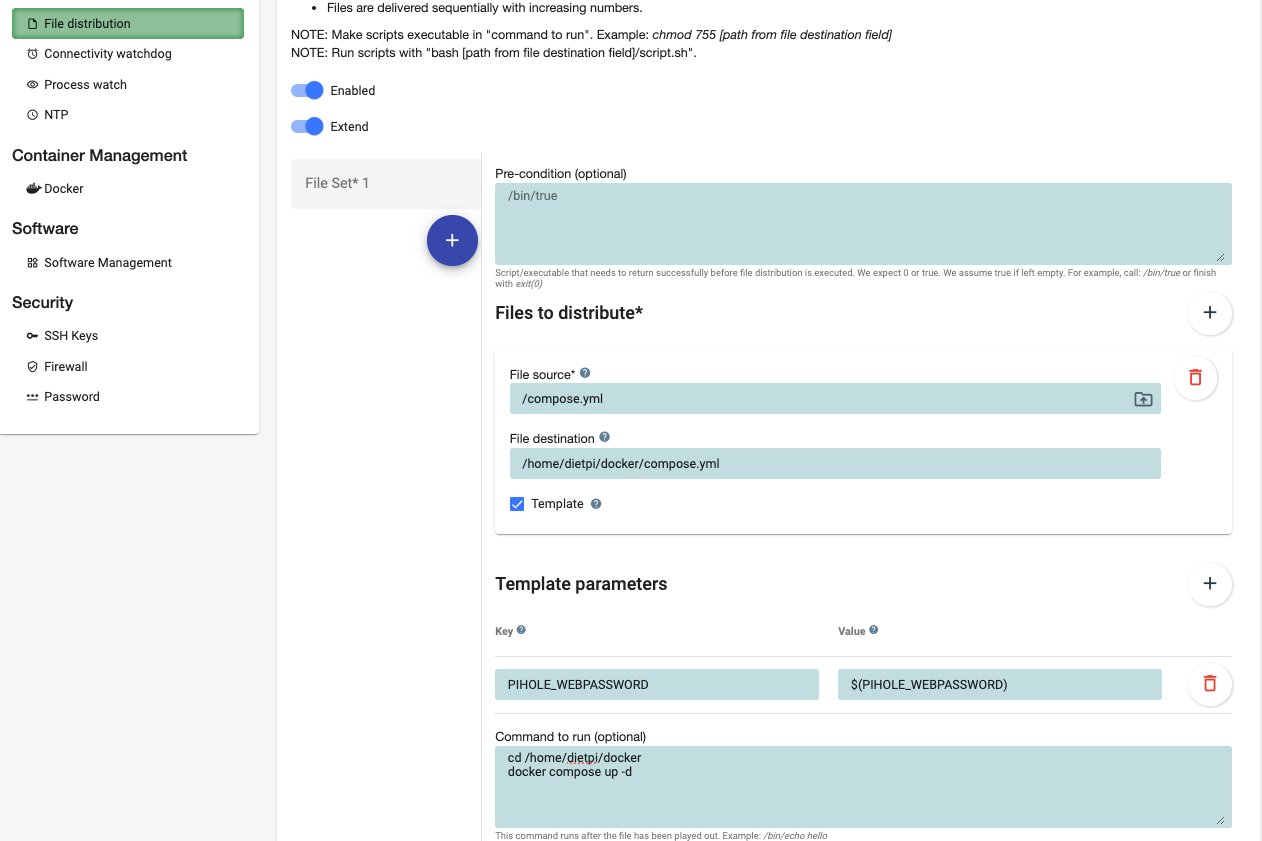
Click "Save settings" at the bottom of the form and "Commit changes" in the top right corner.
Now, patiently wait for approximately 5 minutes for the next agent run. Once completed, you can review the logs to ensure that everything has been successfully set up.
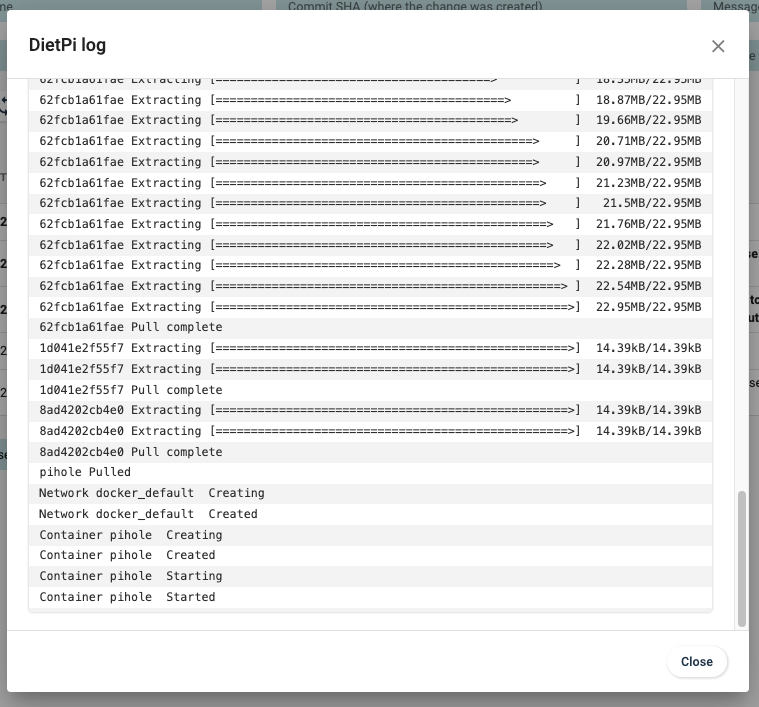
Checking the Results
Open the Logs section. The page auto-refreshes every 30 seconds, allowing you to see the results once the agent finishes.
In the logs, you will find three info messages related to the configuration change.

Click on the "report" icon within the top line to view the entire console output. Look for the last line indicating "Container pihole Started."
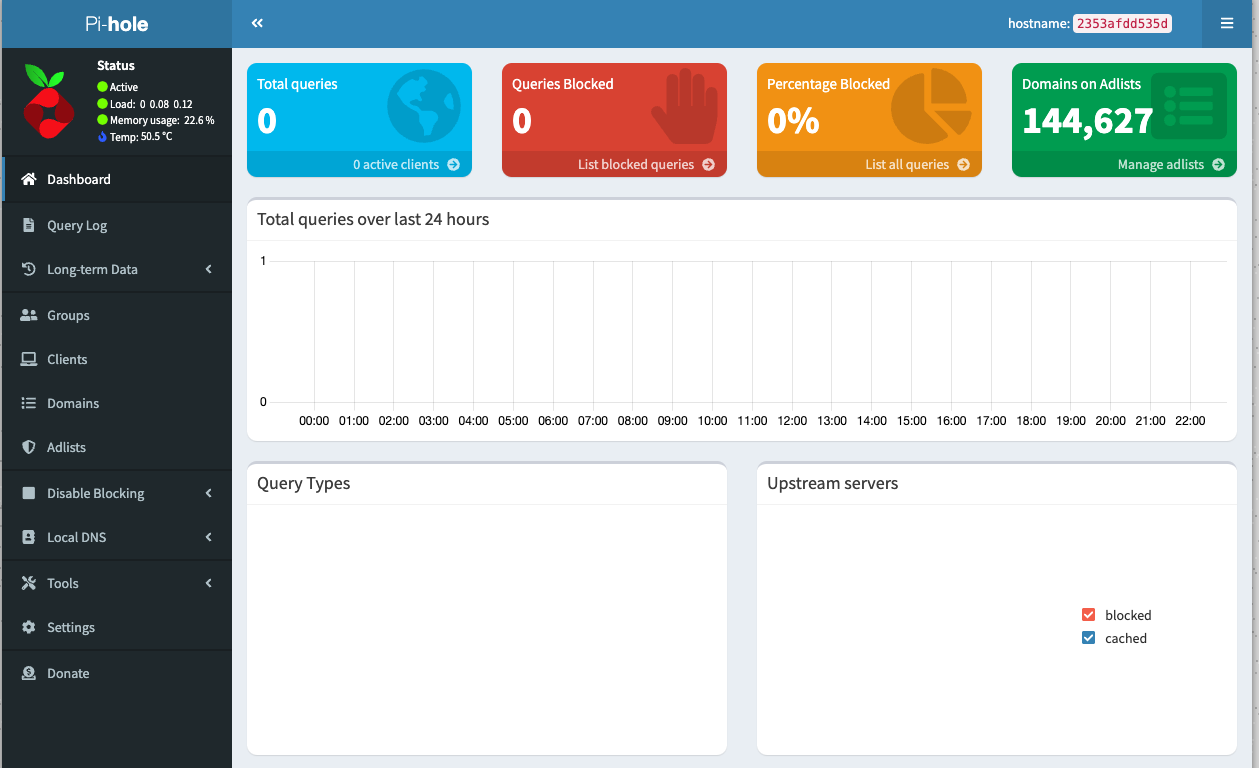
Now, let's verify if Pi-hole is working:
Open a new browser tab.
- Enter the DietPi IP address, followed by "/admin." For example, in my case: http://192.168.0.127/admin/
- Enter the password specified in the secrets.
Next step:
You now can configure your router to use the Pi-hole as DNS server. This will allow you to block ads on all devices in your network. Also, check out our tutorial on how to install qbee-agent on OpenWRT
Unlock more control over your Pi-hole installation by exposing additional parameters in the compose.yml file (see: Pi-hole Docker GitHub).
Why doing this with qbee.io?
- Configuration management: qbee.io allows you to manage the configuration of your devices in a simple and efficient way.
- File distribution: qbee.io allows you to distribute files to your devices and execute commands on them.
- Secrets management: qbee.io allows you to manage secrets in a secure way.
- Log management: qbee.io allows you to view the logs of your devices in a simple and efficient way.
- Remote access: qbee.io allows you to access your devices remotely in a secure way. With qbee.io, there's no need to open ports on your router or set up services like Dyndns. Your device can stay securely behind NAT as qbee.io establishes a VPN tunnel from the device to the cloud. This ensures effortless configuration via the UI and hassle-free remote access without compromising security.
On this example we applied the configuration to a single device, but qbee.io allows you to manage thousands of devices in a simple and efficient way. Apply common or different configurations for groups of devices, and manage them from a single UI.