In short: Create a simple digital signage solution based on LibreOffice
In this example we show how to use qbee.io, LibreOffice and optional GitHub to create a Raspberry Pi digital signage solution with dynamic remote content. New versions of a presentation file can be either uploaded to the qbee file manager or they can be provided through a GitHub commit that triggers a runner which then delivers the new file via the qbee REST API. Any new content will cause LibreOffice to start again automatically.
Introduction
In order to achieve a Raspberry Pi digital signage solution this we need to do the following:
- install LibreOffice on the device (this is already installed on a full Raspberry Pi image)
- create a file distribution that distributes the presentation file and restarts LibreOffice safely
- enable a process watch
- prevent screensaver / screen blanking from coming up
- (optional) create a GitHub integration via API and a GitHub runner
- (optional) create a direct REST-API integration from any system you use
Creating a suitable presentation
All presentation software like LibreOffice or PowerPoint allows to create looping presentations that autoplay. The duration of each slide can be defined and then the transition is invoked by a timer rather than using a key or mouse stroke. Please refer to your user manual on how to do this.
Installing LibreOffice
As an example we use a Raspberry Pi here, but any other Linux distribution will work as well. In order to install LibreOffice we need to go to the "Configure" menu and select "Software". Define for which device or group of devices you want to install this. Many Raspbian images have Libreoffice already installed. Then nothing will happen:
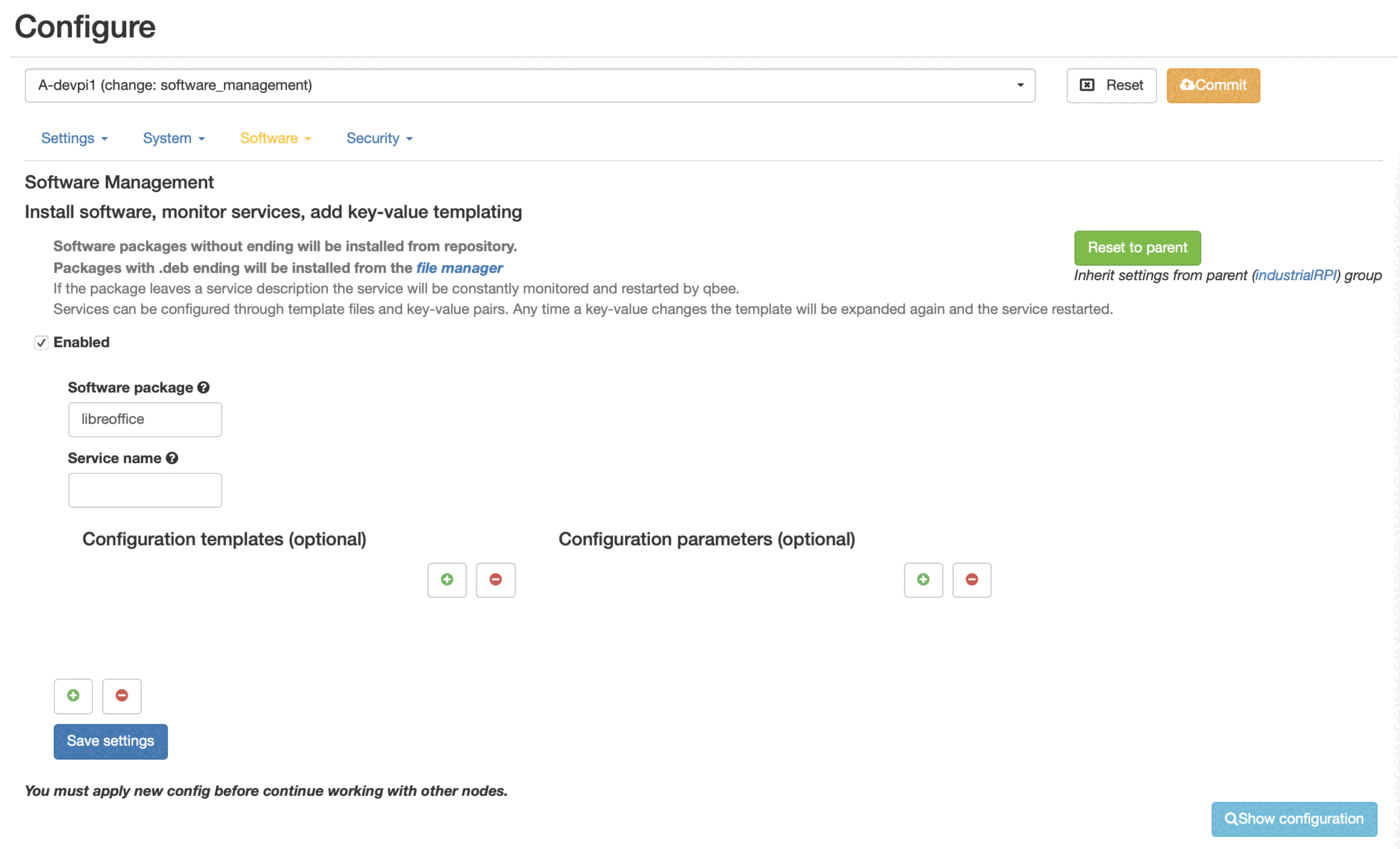
Please make sure that you save this and commit it. Only then it gets executed. The next time the device will connect to qbee the package is installed and the following log entry can be found:

Distributing the Raspberry Pi digital signage content file with file distribution
Then, we upload a suitable presentation (for simplicity we call it "presentation.ppt") to the qbee file manager and a script that will kill the existing process and restart LibreOffice. Please note that you want to run LibreOffice as user "pi" and you need to define the display on which the output should appear (usually this is ":0"; you can check with xrandr). The --show command runs LibreOffice in presentation mode. This will turn LibreOffice into a Raspberry Pi digital signage solution. The script will look as follows:
pres_demo.sh
    #!/usr/bin/env bash

    killall -9 /usr/lib/libreoffice/program/soffice.bin
    killall -9 /usr/lib/libreoffice/program/oosplash


    sudo -u pi DISPLAY=:0 libreoffice --norestore --nolockcheck --show /home/pi/presentation.ppt > /dev/null 2>&1 &
Again, file distribution is used to play out files. This time both the script and the presentation file is distributed within one file distribution. Attached is a "command to run". Any time either one of the files change in file manager (or is deleted on the remote device) the file distribution will run again and trigger the command.
Just changing the command to run does not have an impact!
Only if any of the files change, then the "command to run" will be invoked.
Now, the file distribution has to be created. In "Configure" - "System" - "File distribution" you can define the source file location and the target destination. Since we use a Raspberry Pi we use the standard pi user home folder.
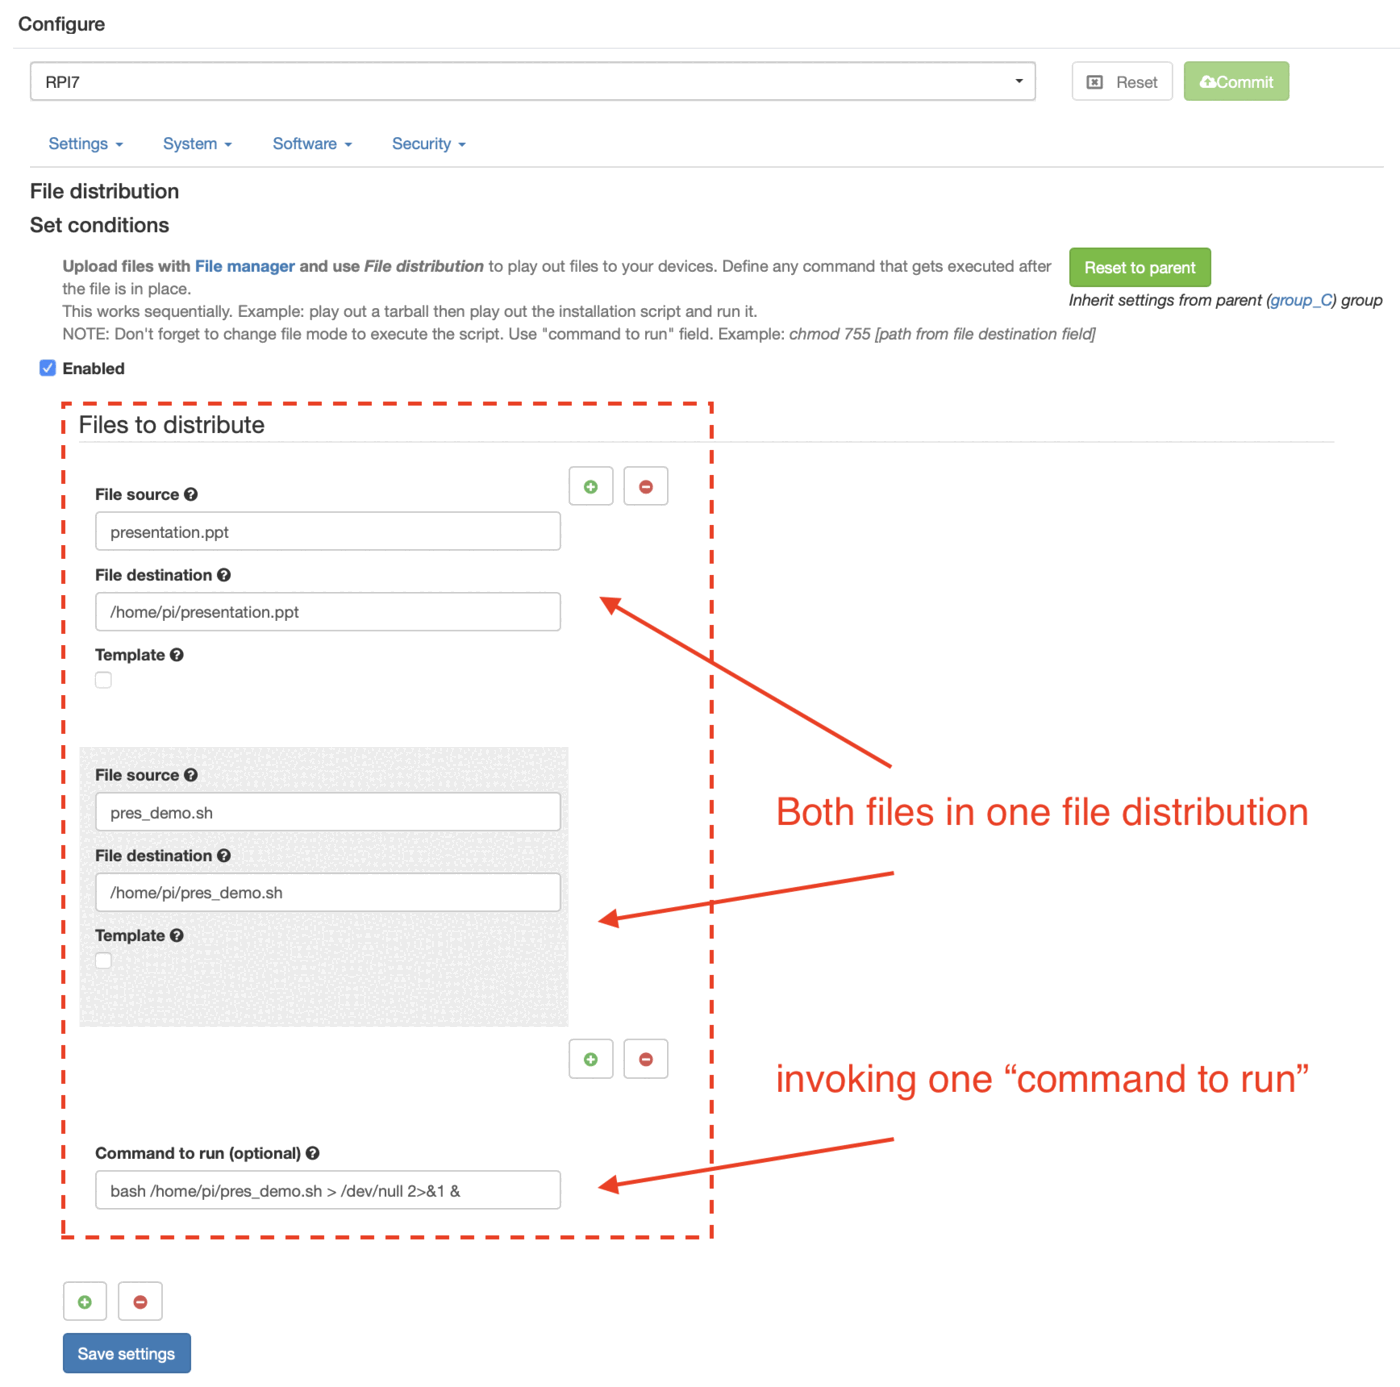
The command to run is bash /home/pi/pres_demo.sh > /dev/null 2>&1 & which executes the script as root and pipes the output to /dev/null.
From now on any time the presentation is uploaded with new content to file manager it will get played out, and Libreoffice is restarted. The next task is to implement a process watch that will restart it automatically if it fails for some reason.
Creating an automatic process watch and restart function
First, we need to identify the process that is really running LibreOffice. This is /usr/lib/libreoffice/program/soffice.bin. If this is not present we want the qbee agent to restart it by invoking the same script from before bash /home/pi/pres_demo.sh. Please go to "Configure" - "System" - "Process watch" and configure it with policy "Present" as follows:
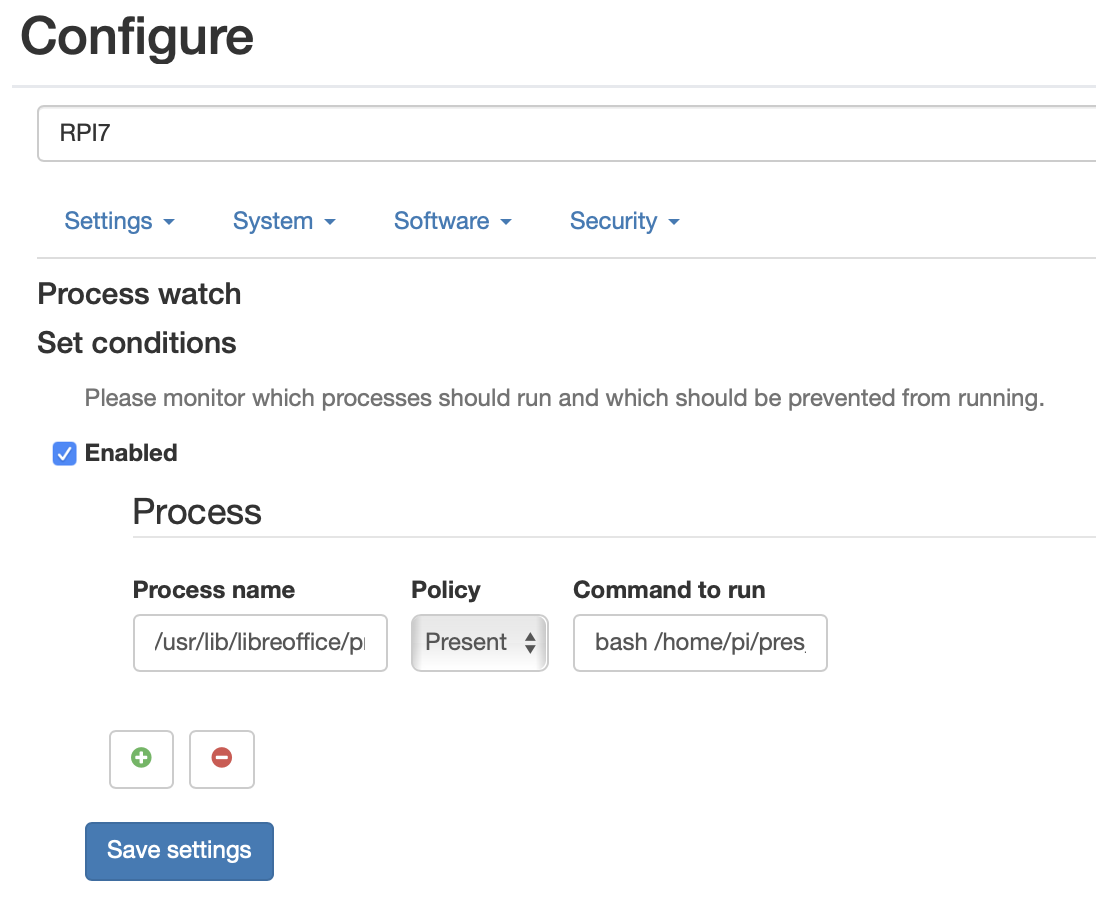
Process watch will detect if a process is present/absent and invoke a command:
This is checked any time the agent is running. By default, this is every 5 minutes. Therefore, with this configuration active, qbee will start the presentation eventually. If you want an immediate start after a reboot you might want to move the command above also to autostart.
In order to prevent the device from entering the screensaver or doing screen blanking please configure your device to prevent this. This can also be solved through another file distribution but this is not in scope here. We addressed this also here.
If the goal is to use this through uploading presentations to qbee's file manager we are done here. You can assign different presentation files to different groups and this allows a lot of flexibility. You can also use this on hundreds of devices.
Using GitHub for version control (as well as access control)
The next part explains how to connect this to GitHub and use a GitHub runner and the qbee REST API to play out presentations through a versioning and repository. There are both CLI and graphical tools available for committing new versions to GitHub, so this should work for developers as well as for management. Please see the last section how to upload binary files to github directly through the web UI.
First, we need to setup the automatic workflow:
- use GitHub for version control management (any change in the
presentation.pptin the GitHub repository will trigger the GitHub runner) - setup a GitHub runner (using GitHub actions) to fetch the new presentation once a push is triggered
- copy the new
presentation.pptfile to theqbee.iofile manager via API calls
How to create a repository on GitHub
Check out the official documentation on how to create a repository on GitHub.
Once a repository is set up, we specify the GitHub secrets as shown in the following screenshot. We define the qbee login mail address as USERNAME_KEY and the password as PASSWORD_KEY.
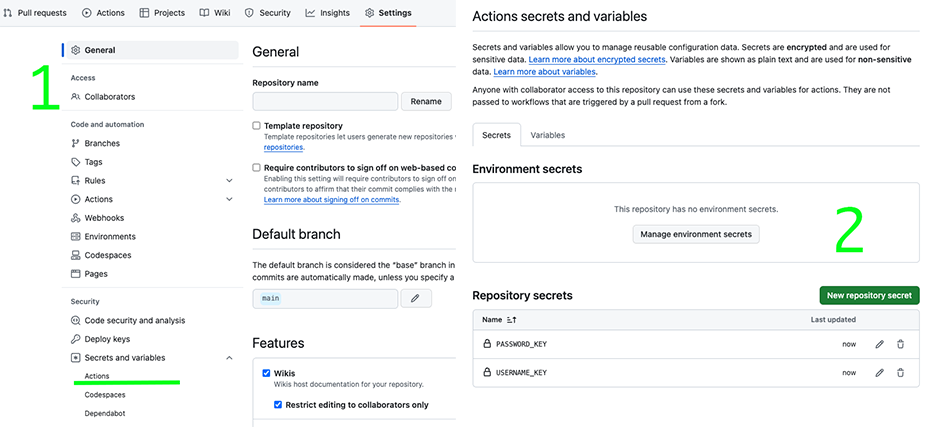
There we specify our qbee.io username and password, as we do not want them to be exposed.
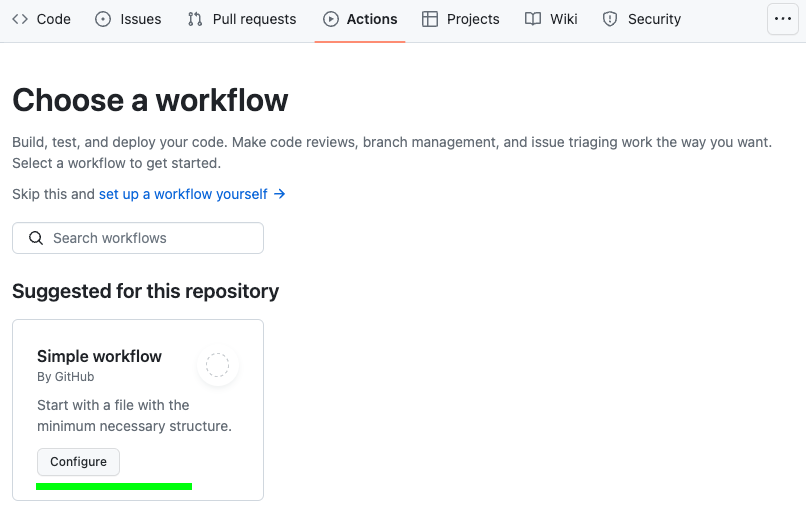
Let's create a GitHub action now. This will run our setup script on a runner. These runners are either provided by GitHub or you use any other machine you have access to. When going to "set up a workflow yourself" you will be able to insert the YAML file below.
The script we used is the following:
GitHub runner file (action) master.yml
name: Automated digital signage solution

on:
    push:
        branches: [ main ]

jobs:
    deploy:
        runs-on: ubuntu-latest
        steps:
        - uses: actions/checkout@v2

        - name: qbee.io authentication
          uses: qbee-io/authenticate-action@main
          with:
            login: ${{ secrets.USERNAME_KEY }}
            password: ${{ secrets.PASSWORD_KEY }}

        - name: qbee.io file upload
          uses: qbee-io/qbee-io/file-upload-action@main
          with:
            source: presentation.ppt
            destination: '/'
Comments on the yaml file
- this action is triggered on pushes to the
masterbranch. It is possible to use different tags such asrelease - the runner creates a virtual machine with a clean OS. We use
UbuntuOS since we specifiedubuntu-latest - your repository is checked out with the
actions/checkout@v2option - optional: the
presentation.pptis copied into$FILENAME(FILENAMEmust be different thanpresentation.ppt - a custom GitHub action places the output file into the
qbee.iofile manager (within the action theqbee.ioREST API is used, c.f. file distribution via API)
Your credentials will not be in the output.
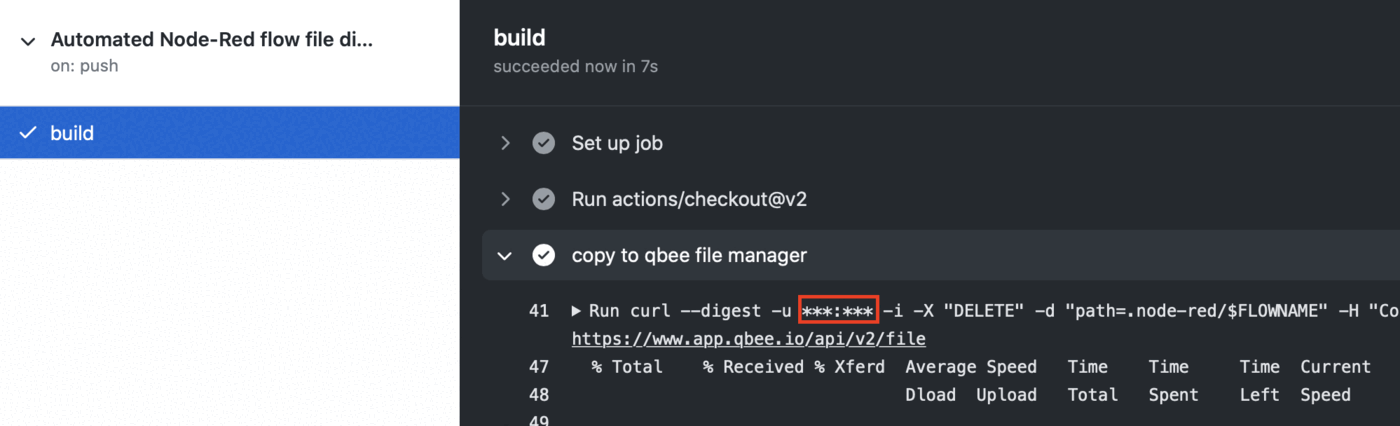
Any new commit to GitHub master will now trigger a new distribution of the presentation and LibreOffice will be restarted. It is also possible to use just the API instead of GitHub. Please use the API call in the YAML file for an idea how to integrate this into your own projects / workflows easily utilizing cURL.
Uploading new PowerPoint files to GitHub through a web UI
As mentioned GitHub can be used to control who can upload new presentations and this can be done through the command line or very easily through the web UI. The later is very well suited for management or administrative personnel.
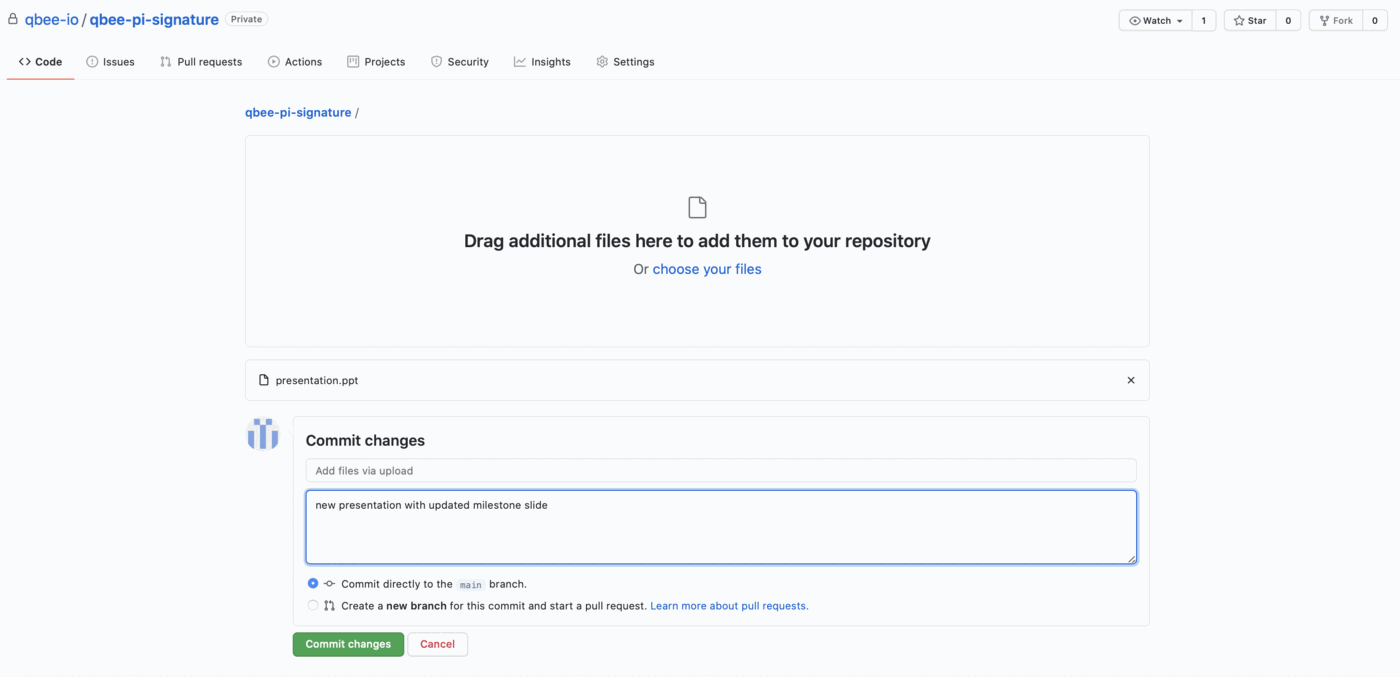
Just log into GitHub and select "Add file". There you choose "Upload file":
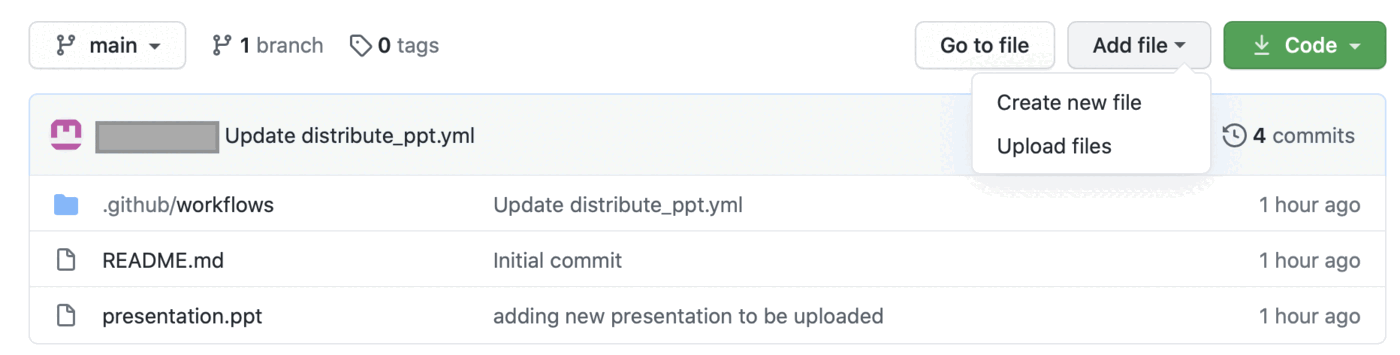
Then select a file with the correct name (this work flow is optimized for presentation.ppt, but you could just as well have different files like Oslo-first-floor-welcome.ppt and Trondheim-fourth-floor-laboratory.ppt that will automatically get played out to the correct location) and upload it. A commit comment (and potentially a version number) will be highly appreciated by your colleagues.