What are OTA A/B image updates?
OTA A/B image updates, sometimes also called "firmware" updates are a robust and low level mechanism to fully update a device. This involves a bootloader that can switch between an A or B partition. In an update process a new image/firmware is transferred to the non-active partition. Then a reboot is issued and the bootloader tries to boot into the updated partition. If successful the update was successful. If not the bootloader will try a certain amount of times and then revert back to the old partition. Thus this is a very robust mechanism. Additional enhancements are so-called delta updates. In a delta update only the changes in an image are transferred. This can also be done with adaptive streaming to optimize file transfer. In order to be useful there usually is a persistent partition on the device. This is needed by the agent to maintain its keys and state.
Firmware updates with RAUC
RAUC, short for "Robust Auto-Update Controller" is a powerful and versatile tool designed to manage software updates in embedded systems. This open-source framework has become a cornerstone in the realm of embedded Linux development, offering a robust solution for handling the complexities of updating software on devices ranging from IoT gadgets to industrial machines.
We prepared a demo tutorial that allows to run a full A/B OTA update on a virtual device in Docker.
The qbee-agent can integrate with any system utility using it's configuration management abilities and this example will show how to integrate RAUC with Yocto and perform OTA updates using qbee-agent and RAUC. As a prerequisite for this example you need to have followed the steps here.
Once again we will use Yocto to set this up:
-
Extend the Yocto environment
git clone -b kirkstone https://github.com/rauc/meta-rauc.git layers/meta-raucThis example uses
qemux86-64as target hardware, and in order to do so we need to fetch the Board Support Package (BSP) from a separate repo.git clone -b master https://github.com/rauc/meta-rauc-community.git layers/meta-rauc-community -
Set up the build environment to include RAUC
source layers/poky/oe-init-build-env bitbake-layers add-layer ../layers/meta-rauc bitbake-layers add-layer ../layers/meta-rauc-community/meta-rauc-qemux86 -
Add build configuration for rauc
Additions to
build/conf/local.confDISTRO_FEATURES += "rauc" MACHINE_FEATURES:append = " pcbios efi" EXTRA_IMAGEDEPENDS += "ovmf" PREFERRED_RPROVIDER_virtual-grub-bootconf = "rauc-qemu-grubconf" CORE_IMAGE_EXTRA_INSTALL += "rauc"Updates with RAUC are always cryptographically signed and verified using public key certificates according to the X.509 standard.
build/conf/site.confRAUC_KEYRING_FILE="<path-to-ca-cert>" RAUC_KEY_FILE="<path-to-signing-private-key>" RAUC_CERT_FILE="<path-to-signing-certificate>"Size of root file system
The root filesystem which is created for the qemu image might need to be adjusted for this example to work. This is done in the file
layers/meta-rauc-community/meta-rauc-qemux86/wic/qemux86-grub-efi.wkswhere the following lines control the size of the A and B partition:This example uses the following instead:part / --source rootfs --ondisk sda --fstype=ext4 --label root_a --fixed-size=150M --align 4096 part / --source rootfs --ondisk sda --fstype=ext4 --label root_b --fixed-size=150M --align 4096part / --source rootfs --ondisk sda --fstype=ext4 --label root_a --fixed-size=200M --align 4096 part / --source rootfs --ondisk sda --fstype=ext4 --label root_b --fixed-size=200M --align 4096 -
Build the image target. This example builds the target
core-image-minimalfor aqemux86-64machine.MACHINE="qemux86-64" bitbake core-image-minimal -
Run your image with qemu
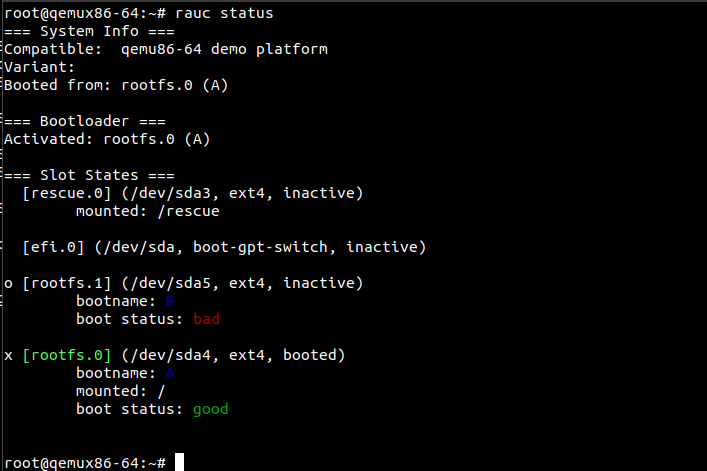
MACHINE="qemux86-64" runqemu nographic slirp ovmf wic core-image-minimalWe can now check the status of RAUC
The qbee-agent automatically registers with the qbee.io backend, and you can now try to perform a yocto image update.
-
Build the RAUC bundle containing the updates
The update bundle is now located underMACHINE="qemux86-64" bitbake qemu-demo-bundlebuild/tmp/deploy/images/qemux86-64/qemu-demo-bundle-qemux86-64-<timestamp>.raucb -
Upload the update bundle to the qbee.io file manager. In this example we put the update bundle under
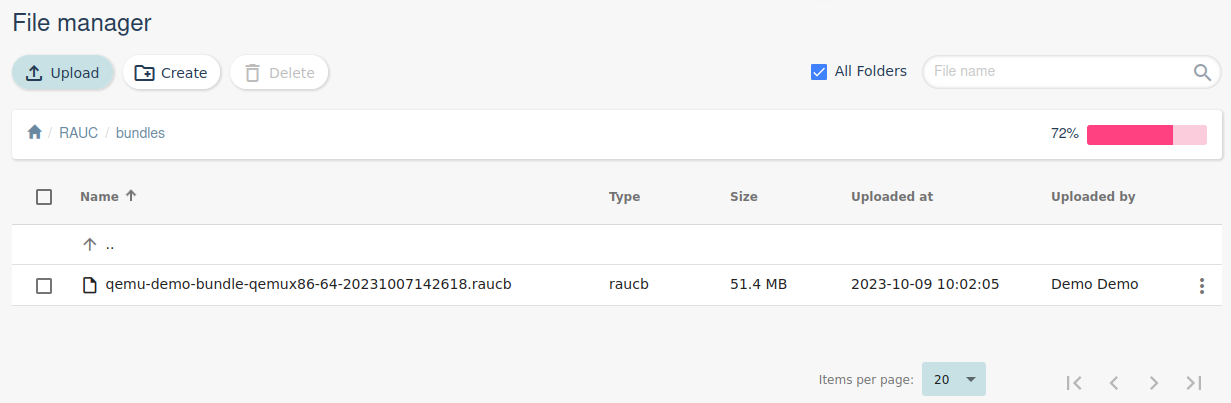
-
Configure a RAUC configuration to do the actual bundle update.
It should then look like this in the UI.

Here we have enabled the policy for the pre-made
Yocto RAUCgroup. Once this configuration is saved and committed, the qbee-agent will pull down the update bundle, install it and reboot if installation succeeds.
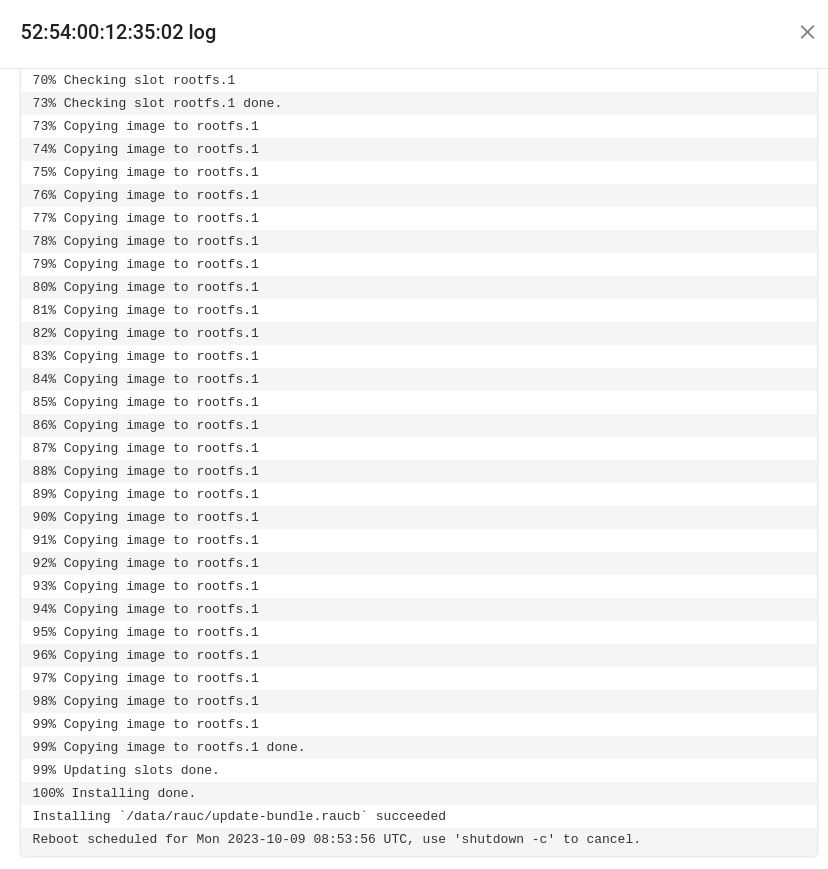
When the qbee-agent has picked up the new configuration you will see the following reports in the UI

We can also check the output of the rauc install by expanding the logs
The device will reboot from the partition containing the update
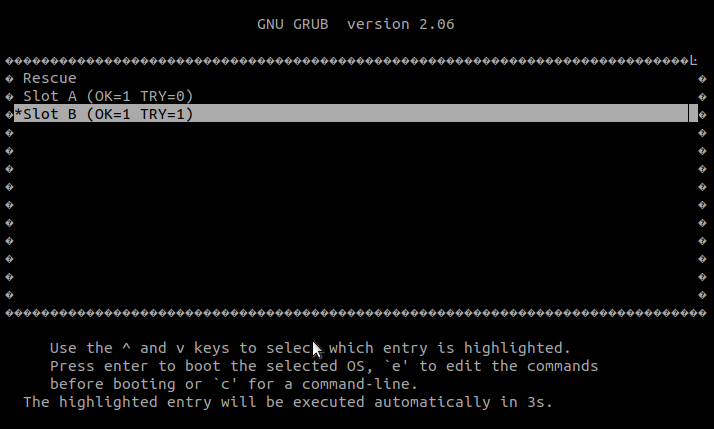
After the device has rebooted we can once again check the rauc status

For more info on RAUC on qemux86-64 please refer to this blog
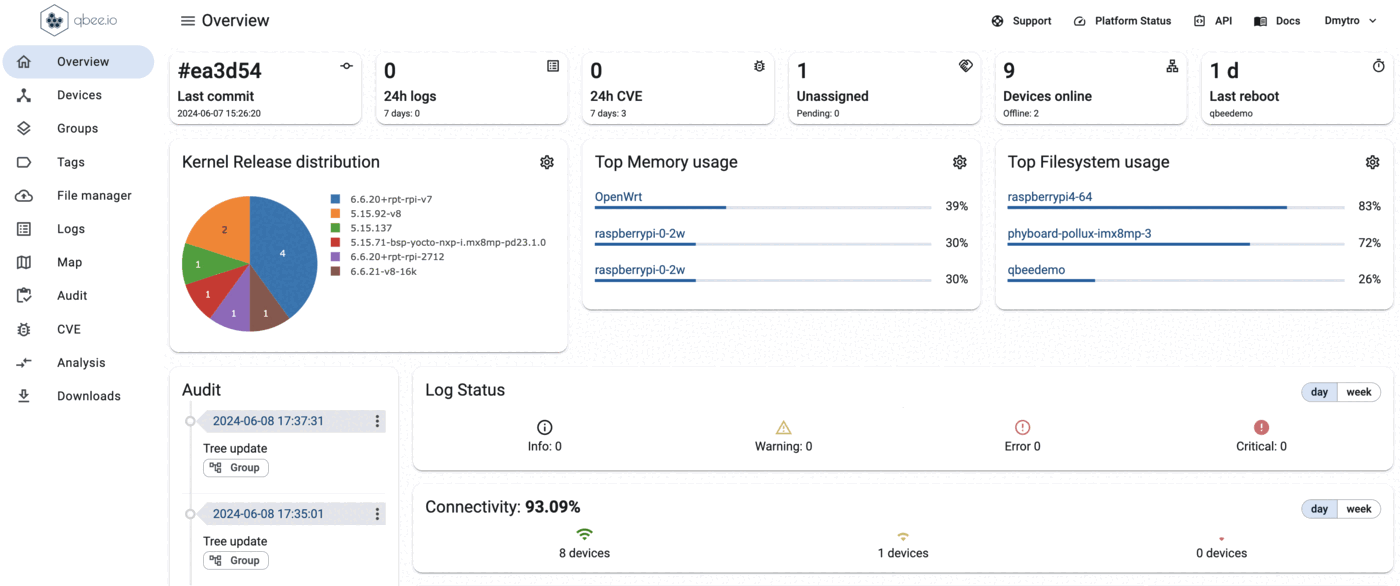
Visualizing the deployment status on the dashboard
On the main dashboard widgets can be configured to show the kernel version distribution or similar This is a helpful addition to logs and gives a quick overview over the status of the rollout. The widget can be configured to show specific groups and it is also available a as table. For more information how to configure this refers to here.