qbee.io has a REST API that allows to access all functionality that is available in the frontend UI. This also includes the key-value pairs that are used in templating. A full REST API description can be found following the link. For your convenience and to enable simple testing a sandbox option is available for testing API calls.
This tutorial has four parts:
- How to create an API user?
- How to use the API sandbox without 2FA?
- How to use the API sandbox with 2FA enabled?
- How to do REST API calls from a script or an application?
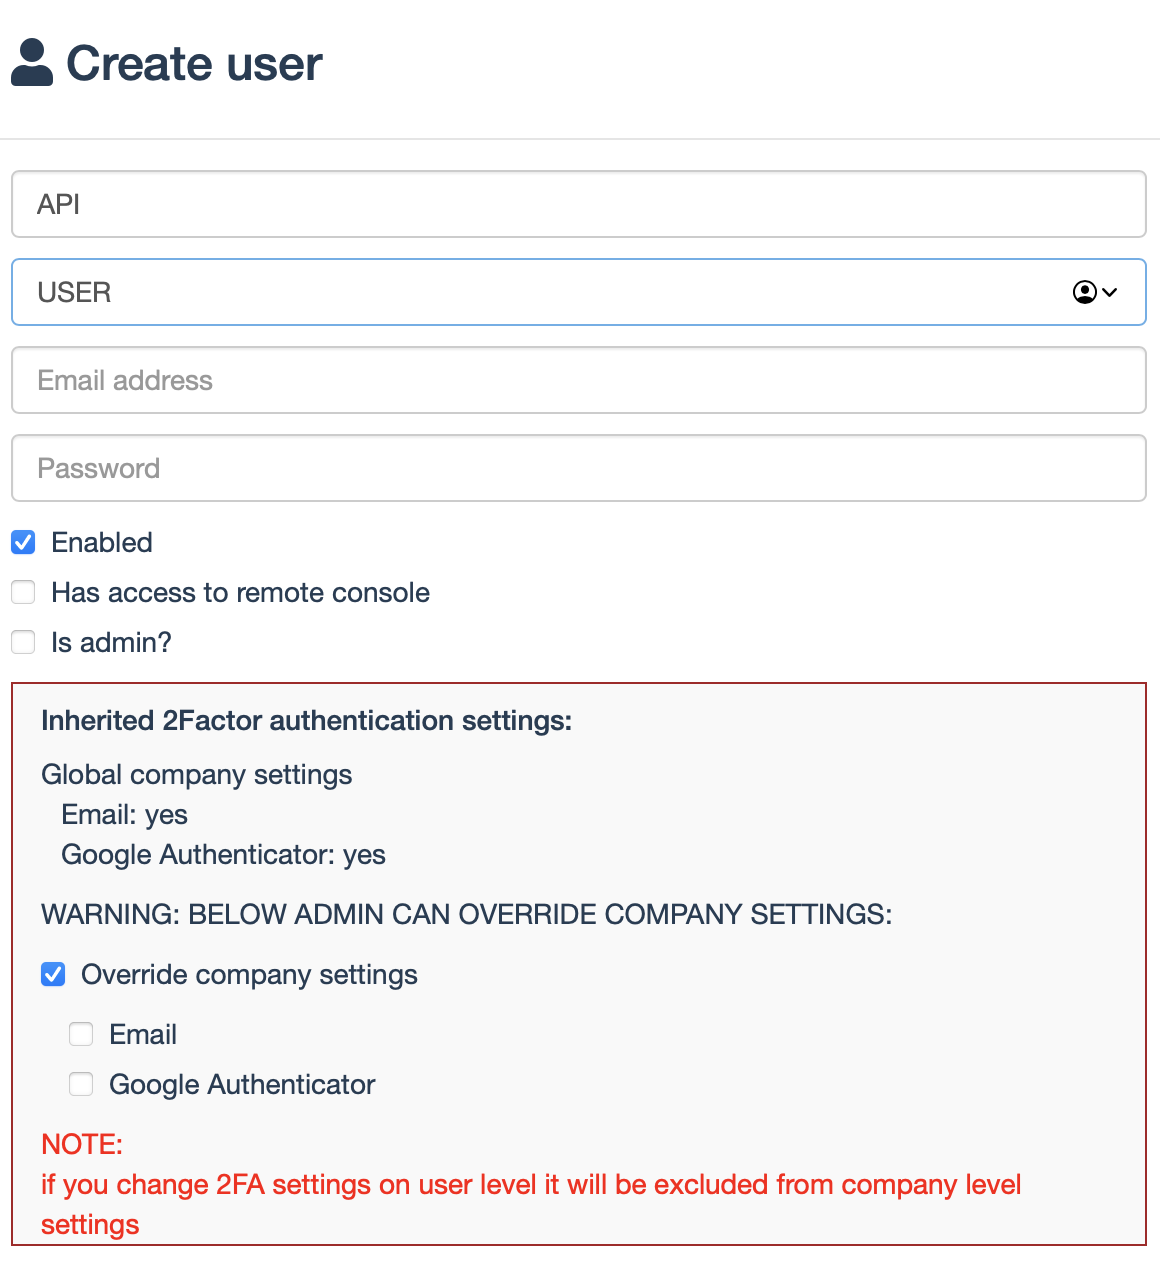
How to create an API user?
As a first thing you need to create an API user. We recommend to use an API user without 2-factor authentication enabled. Below you will see how you can override a general 2FA policy for the API user. It is possible to use the sandbox and the API from your software with 2FA. But then the procedure gets slightly more complex as described in the sandbox with 2FA part.
How to create an API user?
We recommend to have 2FA enabled, but not for the API user. Here is how to override 2FA for this user:
How to use the API sandbox without 2FA?
On the API page there is a sandbox option that allows to easily extract json information when logged in. This is often used to test and optimize queries. This is a two step process in which a token needs to be queried and then this can be used:
Sandbox without 2FA
-
Login
Locate: /api/v2/login from here.
Click on sandbox tab and enter your username and password then click try.
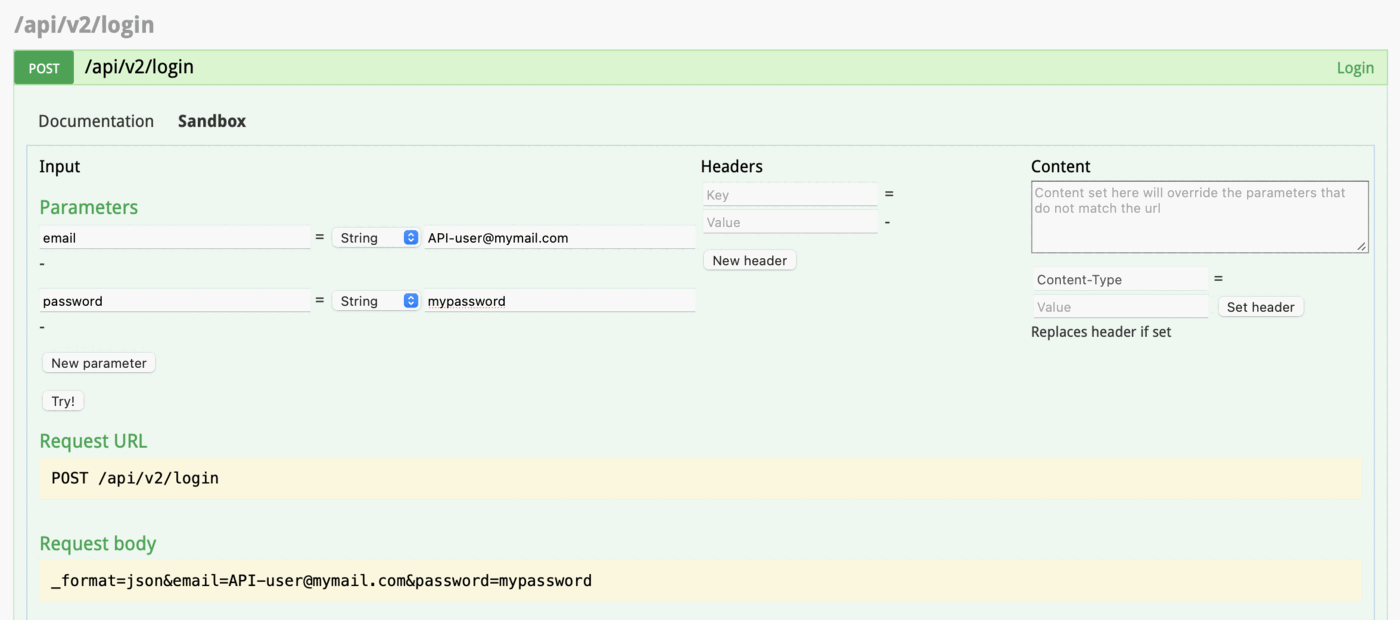
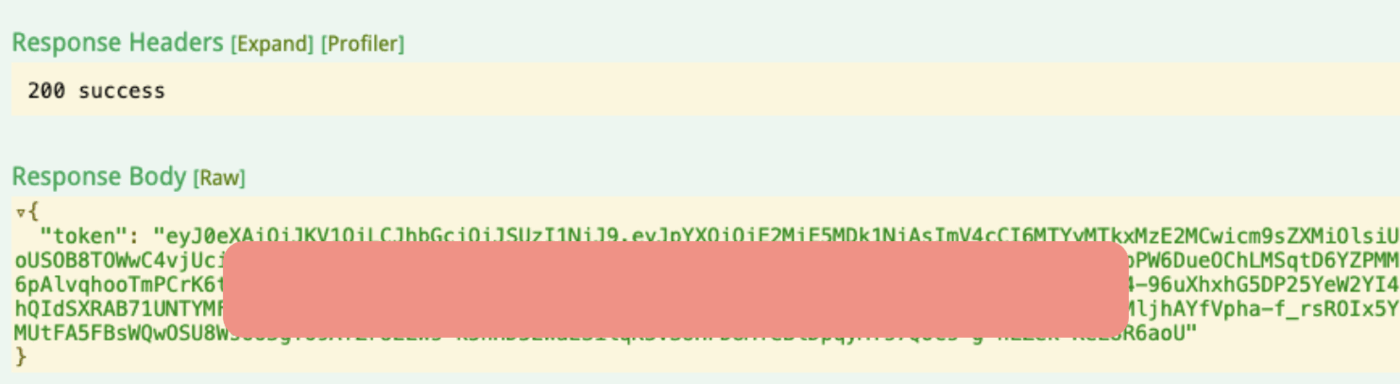
On successful login you’ll get a reply with the token. Copy the value of token
-
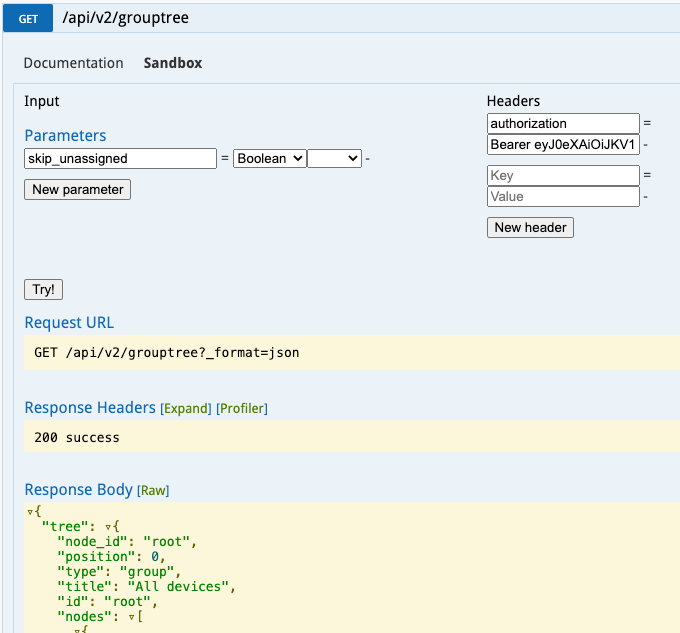
Do the API call you want, for example, get device tree
Locate: /api/v2/grouptree from here.
Click on the sandbox tab
Enter the following into the Headers:
Key => authorization
Value => Bearer <token from the login step>
Click on
Try!You should get the device tree
How to use the API sandbox with 2FA enabled?
It is fully possible to use the REST-API with 2FA enabled:
Sandbox with 2FA enabled
- Do step 1 from above and copy the value of the “challenge”
-
Find the authentication section and open the /api/v2/challenge-get section.
Enter the copied challenge into the challenge field.
Enter email or google (depends on what is available for you) into the “preferProvider” field.
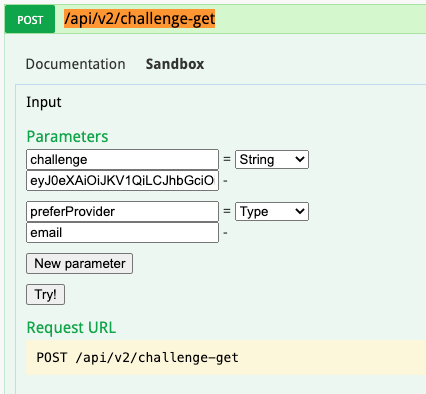
-
Click
Try! -
You will get a response, copy the value of the “challenge” and check your email for the code
-
Find the /challenge-verify section
-
Enter copied challenge from step 4 into the challenge field and code from email into the code field
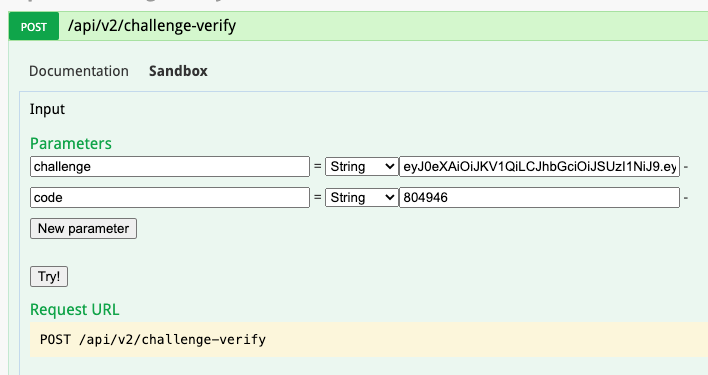
-
Click
Try! - As a response, you’ll get the token, which you should use in the same way as in step 2 from the non-2fa section
How to do REST API calls from a script or an application?
The same mechanism that works in the sandbox can also be implemented in code. Below we give you some bash examples but this can be implemented in any programming language. In these examples we assume that the API user has no 2-factor authentication enabled. This is for simplicity. You can of course also tweak this to use 2FA as described in the sandbox example.
The authentication is jwt based. Therefore, you need to install the jq package or something similar:
Install jq
apt-get install jq
The following example script shows how to authenticate and get the grouptree information. Username and password are provided as system variables $QBEE_USER and $QBEE_PW.
grouptree_no_files.sh
   successful_status_code='200'
   auth='false'
   i=0
   token=""

   while [[ "$auth" != "true" && $i -lt 10 ]]
   do
       echo "try number $((i++))"
       output=$(curl --request POST -sL --url 'https://www.app.qbee.io/api/v2/login' \
           --header "Content-Type: application/json" \
           -d "{\"email\":\"$QBEE_USER\",\"password\":\"$QBEE_PW\"}"\
           -w "\n{\"http_code\":%{http_code}}\n")

       http_code=$(echo $output | jq -cs | jq -r '.[1].http_code')
       echo $http_code
       tokenValue=$(echo $output | jq -cs | jq -r '.[0].token')
       echo $tokenValue

       if [ "$http_code" != "$successful_status_code" ]

       then
           echo $tokenValue
       #uncomment next line to do nothing
       #:
       else
           auth='true'

           apiOutput=$(curl --request GET -sL \
              --url 'https://www.app.qbee.io/api/v2/grouptree?_format=json'\
              --header 'Authorization: Bearer '"$tokenValue")

           echo "API output is:\n$apiOutput"

           #uncomment to following to write to a file instead:
           # curl --request GET -sL \
           #    --url 'https://www.app.qbee.io/api/v2/grouptree?_format=json'\
           #    --output './grouptree_result.json' \
           #    --header 'Authorization: Bearer '"$tokenValue" \

           # echo "$(cat grouptree_result.json)"

       fi

   done
Based on the above authentication a file delete and file upload would look like this:
delete_and_upload_file.sh
    successful_status_code='200'
    auth='false'
    i=0
    token=""

    while [[ "$auth" != "true" && $i -lt 10 ]]
    do
        echo "try number $((i++))"
        output=$(curl --request POST -sL --url 'https://www.app.qbee.io/api/v2/login' \
            --header "Content-Type: application/json" \
            -d "{\"email\":\"$QBEE_USER\",\"password\":\"$QBEE_PW\"}"\
            -w "\n{\"http_code\":%{http_code}}\n")

        http_code=$(echo $output | jq -cs | jq -r '.[1].http_code')
        echo $http_code
        tokenValue=$(echo $output | jq -cs | jq -r '.[0].token')
        echo $tokenValue

        if [ "$http_code" != "$successful_status_code" ]

        then
            echo $tokenValue
        #uncomment next line to do nothing
        #:
        else
            auth='true'

            apiOutput=$(curl -i --request "DELETE" \
               --url 'https://www.app.qbee.io/api/v2/file?path=/my-folder/my-file.txt'\
               --header 'Authorization: Bearer '"$tokenValue")
            echo "API output is:\n$apiOutput"

            apiOutput=$(curl -i --request POST -H "Content-Type:multipart/form-data" -F "path=/my-folder/" -F "file=@my-file.txt" \
               --url 'https://www.app.qbee.io/api/v2/file'\
               --header 'Authorization: Bearer '"$tokenValue")
            echo "API output is:\n$apiOutput"

        fi

    done
In some of our demos we use GitHub runner actions do distribute Node-RED files. This is basically a simple CI/CD (continuous integration / continuous deployment) pipeline. An example can be found in this GitHub example. For this purpose we have created custom GitHub actions to facilitate the interaction with our API. Below you see how such a GitHub runner action would look like assuming your GitHub secret for user is USERNAME_KEY and for password is PASSWORD_KEY:
main.yml
    name: Automated Node-RED flow file distribution

    on:
     push:
        branches: [ main ]
     pull_request:
        branches: [ main ]

    jobs:

     build:
        runs-on: ubuntu-latest
        steps:
        - uses: actions/checkout@v2

        - name: create tarball
          run: |
            mkdir ./tar
            tar --exclude='./.git' --exclude='README.md' --exclude='./.github' --exclude='./tar' -czvf ./tar/node-red-files.tar .

        - name: qbee.io authentication
          uses: qbee-io/authenticate-action@main
          with:
            login: ${{ secrets.USERNAME_KEY }}
            password: ${{ secrets.PASSWORD_KEY }}

        - name: qbee.io file upload
          uses: qbee-io/qbee-io/file-upload-action@main
          with:
            source: './tar/node-red-files.tar'
            destination: 'node-red-demo'
Please let us know if you have any questions. We can help you to get started with the API. And please remember that you can also control location and much more with the API.
Note: API Updates
We are updating our API continuously, and not everything is possible to demonstrate in our API sandbox. Please check the API V2 Updates for more details.